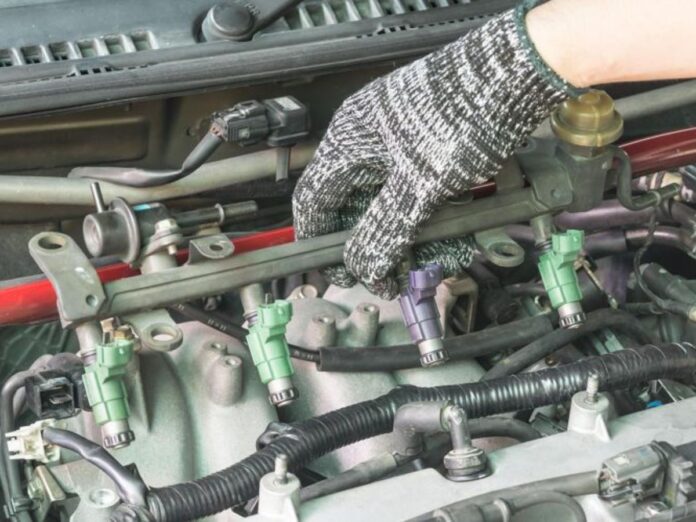
Fuel injectors are the unsung heroes of your engine, ensuring precise fuel delivery for optimal combustion. Over time, they can become clogged with dirt, debris, and carbon buildup, impacting performance and fuel efficiency. Enter the world of cleaning fuel injectors—a straightforward process that can save you time, money, and frustration. Whether you’re tackling this as part of your maintenance routine or addressing performance issues, this guide has you covered.
Let’s get hands-on and explore how to clean fuel injectors step by step. Along the way, we’ll touch on fuel injector testing, an essential step to ensure everything’s running smoothly.
Why Clean Fuel Injectors Matter
Before diving into the nitty-gritty, let’s talk about why clean fuel injectors are critical. Dirty injectors can lead to uneven fuel distribution, reduced fuel economy, misfires, and even damage to your engine over time. Cleaning them not only restores performance but also extends the lifespan of your fuel system.
Step 1: Gather Your Supplies
First things first—prepare your workspace and grab the tools you’ll need. Cleaning fuel injectors isn’t as complicated as it sounds, but having the right equipment is key. Here’s your checklist:
- Fuel injector cleaning kit (available online or at auto parts stores)
- Protective gloves and eyewear
- Wrenches or socket set (depending on your vehicle’s setup)
- Clean rags or paper towels
- A high-quality fuel injector cleaner solution
- Access to the vehicle’s battery (for direct cleaning systems)
For those who want to test the injectors beforehand, fuel injector testing kits are also widely available and can help identify clogged or underperforming units.
Step 2: Perform a Fuel Injector Test
Before cleaning, it’s a good idea to determine whether your fuel injectors are the source of the problem. This is where fuel injector testing comes into play.
How to Test Your Fuel Injectors
- Visual Inspection: Check for visible signs of wear, leaks, or damage. Cracks or corrosion indicate the need for replacement rather than cleaning.
- Flow Testing: Using a fuel injector testing kit, measure the spray pattern and flow rate. This will help identify whether injectors are delivering fuel evenly and at the correct volume.
- Electrical Testing: Test the injector’s resistance with a multimeter to ensure it’s receiving the proper voltage.
If the tests show significant issues, cleaning might not be enough, and a replacement could be necessary.
Step 3: Disconnect the Fuel Injectors
Once testing is complete, it’s time to remove the fuel injectors for cleaning. This involves a bit of disassembly:
- Depressurize the Fuel System: Locate the fuel pump fuse and disconnect it. Start the engine to burn off any remaining fuel in the lines.
- Remove the Injector Rail: Carefully disconnect the fuel injector rail from the engine. Be sure to follow your vehicle’s manual for specific instructions.
- Detach the Injectors: Use a wrench to unscrew and remove each fuel injector. Be mindful of seals and O-rings, as these need to be reinstalled correctly.
Step 4: Clean the Fuel Injectors
Now for the fun part—cleaning those injectors! There are two main methods:
1. Using a Cleaning Kit
Many fuel injector cleaning kits allow for direct cleaning while the injectors are still in the vehicle. Follow these steps:
- Attach the cleaning kit to the fuel system following the instructions provided.
- Add the cleaning solution to the kit’s reservoir.
- Start the engine and let it run until the solution is used up. This flushes out contaminants from the injectors.
2. Manual Cleaning
For a deeper clean, you’ll need to remove the injectors:
- Soak the injectors in a fuel injector cleaner solution to dissolve carbon buildup.
- Use a soft brush or cloth to gently scrub away debris.
- Rinse the injectors with a clean solution and dry them thoroughly before reinstallation.
Step 5: Reinstall the Fuel Injectors
Once clean, it’s time to put everything back together:
- Inspect Seals and O-rings: Replace any damaged seals or O-rings to prevent leaks.
- Reattach the Injectors: Securely fasten each injector to the fuel rail.
- Reconnect the Fuel Rail: Carefully reinstall the fuel rail, ensuring all connections are tight.
- Restore the Fuel System: Reinsert the fuel pump fuse and reconnect the battery.
Step 6: Test Your Work
After reassembly, start the engine and observe its performance. Check for smoother idling, better acceleration, and improved fuel efficiency. If you performed fuel injector testing earlier, consider running another test to confirm the injectors are functioning optimally.
Pro Tips for Maintaining Fuel Injectors
Cleaning your fuel injectors isn’t something you’ll need to do every week, but regular maintenance can help prevent buildup:
- Use Quality Fuel: High-grade fuel often contains detergents that reduce carbon deposits.
- Add Fuel System Cleaners: Periodically use fuel additives to clean injectors and the fuel system.
- Stick to a Maintenance Schedule: Check your vehicle manual for recommended cleaning intervals.
Final Thoughts:
Fuel injectors play a vital role in keeping your engine running smoothly, and a bit of maintenance goes a long way. By following this step-by-step guide, you can restore clogged injectors to their former glory, boost your vehicle’s performance, and save on costly repairs. Don’t forget to include fuel injector testing in the process to pinpoint issues and ensure a job is done well.
So, roll up your sleeves, grab your tools, and give your fuel injectors the care they deserve—you’ll thank yourself the next time you hit the open road!


